-
6. CSS 기본 문법2개발자 수업/HTML5 2021. 11. 2. 20:19
1. 가상 클래스 선택자(Pseudo Classes Selectors)
1) hover
- E:hover
- E에 마우스(포인터)가 올라가 있는 동안에만 E 선택
2) active
- E:active
- E를 마우스로 클릭하는 동안에만 E 선택<!DOCTYPE html> <html> <head> <meta charset="UTF-8"> <title>Insert title here</title> <style type="text/css"> //마우스를 올리고 있는 동안 빨간색 a:hover { color: red; } span { background-color: powderblue; } //마우스를 올리고 있는 동안 배경이 금색 span:hover { background-color: gold; } </style> </head> <body> <a href="https://www.apple.com/kr/">APPLE</a> <br><br> <span>이 곳에 마우스를 올려보세요.</span> </body> </html><!DOCTYPE html> <html> <head> <meta charset="UTF-8"> <title>Insert title here</title> <style type="text/css"> div { width: 100px; height: 100px; background-color: tomato; transition: 0.4s; } //클릭하는 동안에 늘어남 div:active { width: 200px; } //클릭하는 동안에 라임색으로 바뀜 button:active { color:lime; } </style> </head> <body> <div></div> <br><br> <button>클릭하세요.</button> </body> </html>3) focus
- E:focus
- E가 포커스 된 동안에만 E 선택<!DOCTYPE html> <!-- padding: 위 우 아래 좌; 4개 입력 padding: 위 [좌, 우] 아래; 3개 입력 padding: [위, 아래] [좌, 우]; 2개 입력 padding: [위, 아래, 좌, 우]; 1개 입력 --> <html> <head> <meta charset="UTF-8"> <title>Insert title here</title> <style type="text/css"> input { width: 100px; outline: none; padding: 5px 10px; border: 1px solid blue; transition: 0.4s; } input:focus { width: 200px; border-color: red; } .red-input:focus { background: springgreen; color: red; } .blue-input:focus { background: springgreen; color: blue; } </style> </head> <body> <input type="text"> <br><br> <input class="red-input" value="클릭하면 빨갛게 됩니다."> <input class="blue-input" value="클릭하면 파랗게 됩니다."> </body> </html>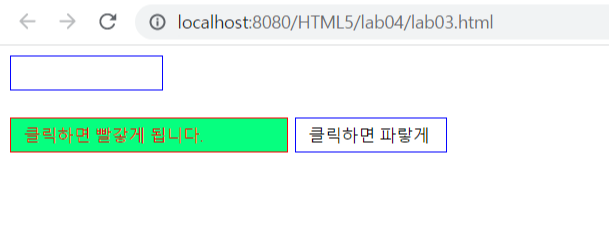
4) first-child
- E:first-child
- E가 형제 요소 중 첫 번째 요소라면 선택<!DOCTYPE html> <html> <head> <meta charset="UTF-8"> <title>Insert title here</title> <style type="text/css"> .fruits li:first-child { color: red; } /* lime, black, 5px */ p:first-child { color: lime; background-color: black; padding: 5px; } </style> </head> <body> <ul class="fruits"> <li>딸기</li> <li>사과</li> <li>오렌지</li> <li>망고</li> </ul> <br><br> <div> <p>first-child입니다.</p> <p>first-child가 아닙니다.</p> </div> <div> <h2>P 태그가 아니라 선택되지 않습니다.</h2> <h2>P 태그가 아니라 선택되지 않습니다.</h2> </div> </body> </html>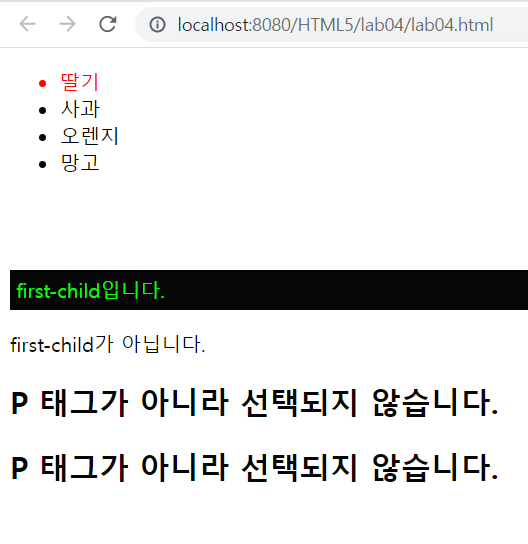
5) last-child
- E:last-child
- E가 형제 요소 중 마지막 요소라면 선택<!DOCTYPE html> <html> <head> <meta charset="UTF-8"> <title>Insert title here</title> <style type="text/css"> .fruits li:last-child { color: red; } /* lime, black, 5px */ p:last-child { color: lime; background-color: black; padding: 5px; } </style> </head> <body> <ul class="fruits"> <li>딸기</li> <li>사과</li> <li>오렌지</li> <li>망고</li> </ul> <br><br> <div> <p>first-child입니다.</p> <p>first-child가 아닙니다.</p> </div> <div> <h2>P 태그가 아니라 선택되지 않습니다.</h2> <h2>P 태그가 아니라 선택되지 않습니다.</h2> </div> </body> </html>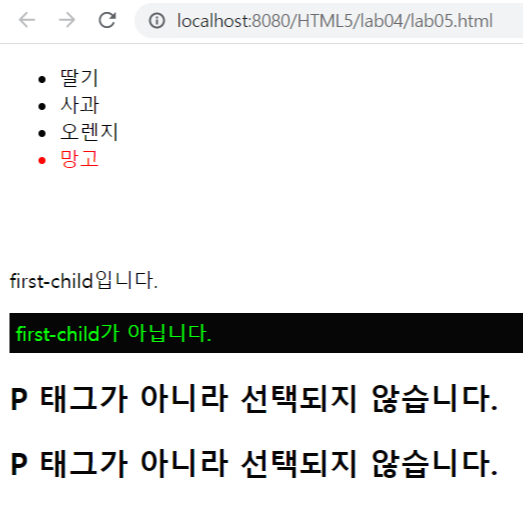
6) nth-child(n)
- E:nth-child
- E가 형제 요소 중 n번째 요소라면 선택<!DOCTYPE html> <html> <head> <meta charset="UTF-8"> <title>Insert title here</title> <style type="text/css"> .fruits li:nth-child(2) { color: red; } </style> </head> <body> <ul class="fruits"> <li>딸기</li> <li>사과</li> <li>오렌지</li> <li>망고</li> </ul> </body> </html>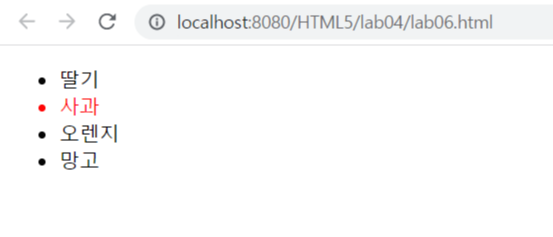
<!DOCTYPE html>
<!-- '짝수'번째 요소들만 선택 -->
<html>
<head>
	<meta charset="UTF-8">
	<title>Insert title here</title>
	<style type="text/css">
		.fruits li:nth-child(2n) {
			color: red;
		}
	</style>
</head>
<body>
	<ul class="fruits">
		<li>딸기</li>
		<li>사과</li>
		<li>오렌지</li>
		<li>망고</li>
		<li>딸기</li>
		<li>사과</li>
		<li>오렌지</li>
		<li>망고</li>
	</ul>
</body>
</html>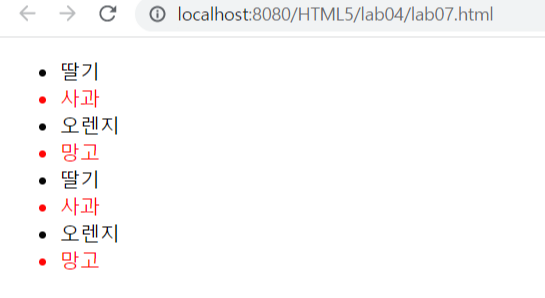
<!DOCTYPE html>
<!-- 3번째 요소부터 이후 요소들을 선택 -->
<html>
<head>
	<meta charset="UTF-8">
	<title>Insert title here</title>
	<style type="text/css">
		.fruits li:nth-child(n+3) {
			color: red;
		}
	</style>
</head>
<body>
	<ul class="fruits">
		<li>딸기</li>
		<li>사과</li>
		<li>오렌지</li>
		<li>망고</li>
		<li>딸기</li>
		<li>사과</li>
		<li>오렌지</li>
		<li>망고</li>
	</ul>
</body>
</html>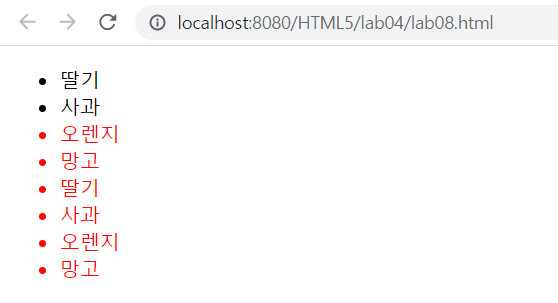
<!DOCTYPE html>
<!--
	.fruits의 첫 번째 요소가 <p></p>가 아니기 때문에 선택되지 않음
 -->
<html>
<head>
	<meta charset="UTF-8">
	<title>Insert title here</title>
	<style type="text/css">
		.fruits p:nth-child(1) {
			color: red;
		}
	</style>
</head>
<body>
	<ul class="fruits">
		<div>딸기</div>
		<p>사과</p>
		<p>망고</p>
		<span>오렌지</span>
	</ul>
</body>
</html>
<!DOCTYPE html>
<!--

 -->
<html>
<head>
	<meta charset="UTF-8">
	<title>Insert title here</title>
	<style type="text/css">
		.fruits .red:nth-of-type(1) {
			color: red;
		}
	</style>
</head>
<body>
	<ul class="fruits">
		<li class="red">딸기</li>
		<li class="red">사과</li>
		<li>망고</li>
		<li class="red">오렌지</li>
	</ul>
</body>
</html>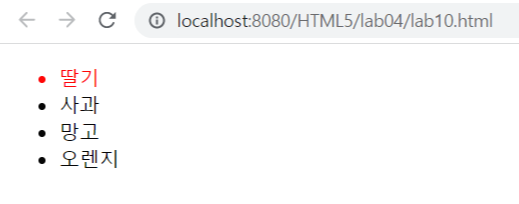
7) nth-of-type(n)
- E:nth-of-type(n)
- E의 타입(태그이름)과 동일한 타입인 형제 요소 중 E가 n번째 요소라면 선택<!DOCTYPE html> <!-- <p></p>들 중에서 첫 번째 요소를 선택함 --> <html> <head> <meta charset="UTF-8"> <title>Insert title here</title> <style type="text/css"> .fruits p:nth-of-type(1) { color: red; } </style> </head> <body> <ul class="fruits"> <div>딸기</div> <p>사과</p> <p>망고</p> <span>오렌지</span> </ul> </body> </html>
<!DOCTYPE html>
<html>
<head>
	<meta charset="UTF-8">
	<title>Insert title here</title>
	<style type="text/css">
		/* 홀수 문단 */
		p:nth-of-type(2n+1) {
			color: red;
		}

		/* 짝수 문단 */
		p:nth-of-type(2n) {
			color: blue;
		}

		/* 첫 번째 문단 */
		p:nth-of-type(1) {
			font-style: italic;
		}
	</style>
</head>
<body>
	<div>
		<div>첫 번째 div 태그</div>
		<p>두 번째 p 태그</p>
		<p>세 번째 p 태그</p>
		<div>네 번째 div 태그</div>
		<p>다섯 번째 p 태그</p>
		<p>여섯 번째 p 태그</p>
		<p>일곱 번째 p 태그</p>
		<p>여덟 번째 p 태그</p>
	</div>
</body>
</html>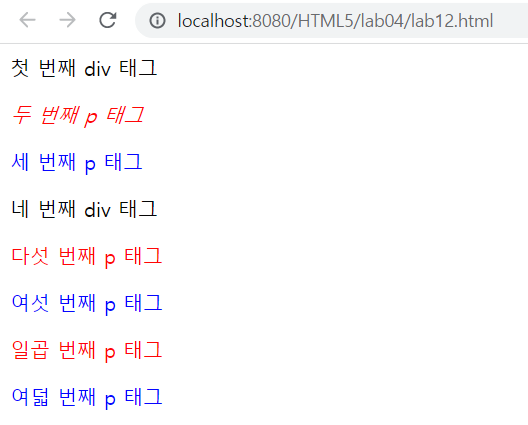
8) 부정 선택자
- E:not(S)
- S가 아닌 E 선택<!DOCTYPE html> <html> <head> <meta charset="UTF-8"> <title>Insert title here</title> <style type="text/css"> .fruits li:not(.strawberry) { color : red; } </style> </head> <body> <ul class="fruits"> <li>사과</li> <li class="strawberry">딸기</li> <li>오랜지</li> <li class="red">망고</li> </ul> </body> </html>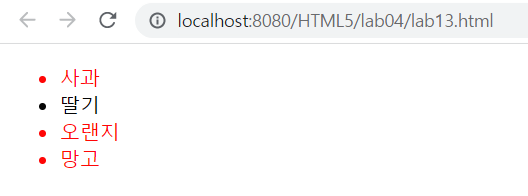
2. 가상 요소 선택자(Pseudo-Elements Selectors)
1) before
- E::before
- E 요소 내부의 앞에 내용(content)을 삽입<!DOCTYPE html> <!-- 각 <li></li> 내부의 앞에 내용(content)으로 $ 문자를 삽입했음 내용을 넣기 위해서는 content 속성이 필수임 --> <html> <head> <meta charset="UTF-8"> <title>Insert title here</title> <style type="text/css"> ul li::before { content: "$"; } </style> </head> <body> <ul> <li>1</li> <li>2</li> <li>3</li> <li>4</li> </ul> </body> </html>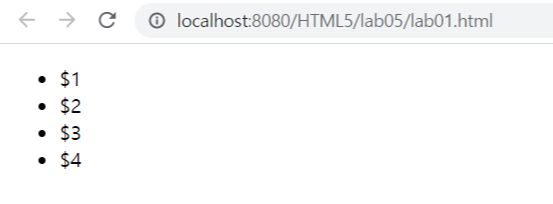
<!DOCTYPE html>
<!--
	url()을 통해서 이미지를 삽입할 수 있음
 -->
<html>
<head>
	<meta charset="UTF-8">
	<title>Insert title here</title>
	<style type="text/css">
		ul li::before {
			content: url("../img/watch.png");
		}
	</style>
</head>
<body>
	<ul>
		<li>1</li>
		<li>2</li>
		<li>3</li>
		<li>4</li>
	</ul>
</body>
</html>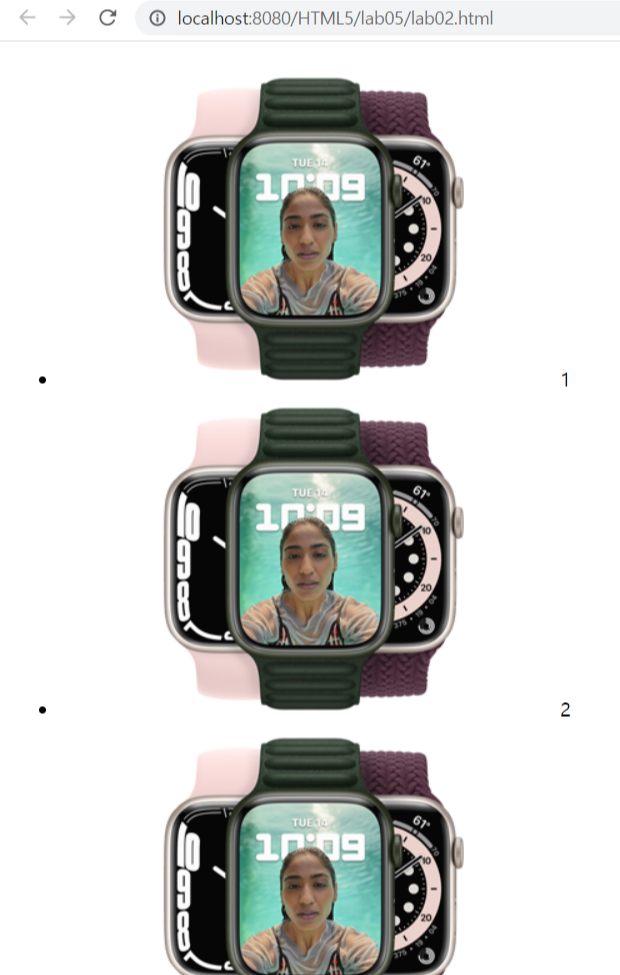
2) after
- E::after
- E 요소 내부의 뒤에 내용(content)을 삽입<!DOCTYPE html> <!-- 각 <li></li> 내부의 뒤에 내용(content)으로 .0 문자를 삽입했음 내용을 넣기 위해서는 content 속성이 필수임 --> <html> <head> <meta charset="UTF-8"> <title>Insert title here</title> <style type="text/css"> ul li::after { content: ".0"; } </style> </head> <body> <ul> <li>1</li> <li>2</li> <li>3</li> <li>4</li> </ul> </body> </html>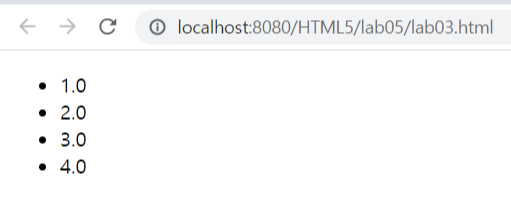
3. 속성 선택자(Attribute Selectors)
1) [attr]
- 속성 attr을 포함한 요소 선택
2) [attr=value]
- 속성 attr을 포함하며 속성 값이 value인 요소 선택<!DOCTYPE html> <html> <head> <meta charset="UTF-8"> <title>Insert title here</title> <style type="text/css"> [disabled] { opacity: 0.5; } [type="password"] { color: red; } </style> </head> <body> <input type="text" value="HAPPY"> <input type="password" value="2022"> <input type="text" value="disabled text" disabled> </body> </html>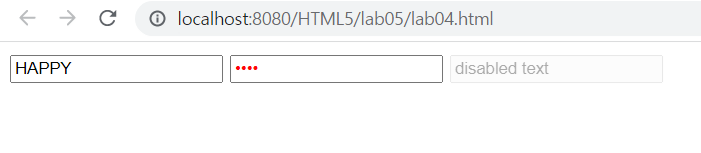
3) [attr^=value]
- 속성 attr을 포함하며 속성 값이 value로 시작하는 요소 선택
4) [attr$=value]
- 속성 attr을 포함하며 속성 값이 value로 끝나는 요소 선택<!DOCTYPE html> <html> <head> <meta charset="UTF-8"> <title>Insert title here</title> <style type="text/css"> [class^=btn-] { font-weight: bold; border-radius: 4px; } [class$="success"] { color: green; } [class$="danger"] { color: red; } </style> </head> <body> <button class="btn-success">Success</button> <button class="btn-danger">Danger</button> <button>Normal</button> </body> </html>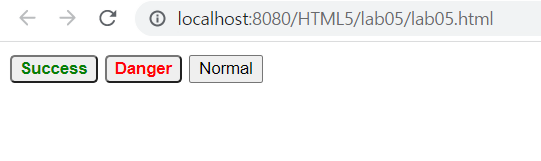
<!DOCTYPE html>
<html>
<head>
	<meta charset="UTF-8">
	<title>Insert title here</title>
	<link rel="stylesheet" href="style.css">
</head>
<body>
	<div class="header">
		<h2>Android Auto와 운전하기</h2>
	</div>

	<div class="nav">
		<div class="menu">어시스턴트</div>
		<div class="menu">경로안내</div>
		<div class="menu">소통</div>
		<div class="menu">엔터테인먼트</div>
		<div class="menu">음악</div>
	</div>

	<div class="container">
		<div class="sidebar">
			<ul>
				<li>경로 찾기</li>
				<li>실시간 알림</li>
				<li>다양한 장소들</li>
				<li>주차 공간 예약</li>
				<li>충전소 찾기</li>
			</ul>
		</div>

		<div class="content">
			<p>
				어디든 갈 수 있습니다.
				실시간으로 Google 지도, Waze 등 자주 사용하는 지도 앱에서 알림을 받으세요.
				Google 어시스턴트에게 물어 주유소를 찾거나 이용 가능한 EV 충전소를 확인하거나 도착 시 사용할 주차 공간을 예약할 수도 있습니다.
				차량 대시보드에 모든 정보가 표시되기 때문에 주변 장소를 더욱 자세히 파악할 수 있습니다.
				어디로 갈지 말씀만 하세요.
				그리고 출발하시면 됩니다.
				사람들과 계속 연락하세요. 손은 필요하지 않습니다.
				Google 어시스턴트가 메시지를 소리내어 읽어줍니다.
				답장 내용을 말하면 답장이 작성됩니다.
				목소리로 전화를 걸고 채팅 앱을 사용하세요.
				Android Auto가 운전을 방해하는 요소를 줄여줍니다.
				다음에 재생할 항목을 말씀해 주세요.
				이동하면서 미디어를 즐기세요. 목소리로 모든 미디어를 제어할 수 있습니다.
				운전할 때 듣는 재생목록을 일시중지했다가 마지막으로 들은 부분부터 다시 재생하세요.
				새로운 오디오북을 시작할 수도 있습니다. 한 곡을 수백 번 반복할 수도 있습니다.
			</p>
		</div>
	</div>
</body>
</html>
@charset "UTF-8"; * { margin: 0; padding: 0; box-sizing: border-box; } body { padding: 1em 2em; line-height: 1.6; font-size: 13px; background-color: lightgray; } .header, .nav, .container { margin-bottom: 1em; } h2 { font-size: 3em; text-align: center; } .nav { text-align: center; } .nav > div { display: inline-block; background-color: palevioletred; color: white; border: 1px solid black; padding: 0.2em 0.5em; } .nav > div:nth-child(even) { background-color: lightseagreen; } .container { height: 100%; } .sidebar { float: left; width: 20%; height: 100%; padding: 1em; } li { border-bottom: 1px solid gray; padding: 0.3em; list-style: none; } li:first-child { border-top: 1px solid gray; padding-top: 0.3em; } li:hover { background-color: dimgray; color: white; } .content { float: right; width: 80%; height: 100%; padding: 1em; border: 1px solid rosybrown; } p::first-letter { font-weight: bold; font-size: 1.5em; } p::selection { background-color: skyblue; }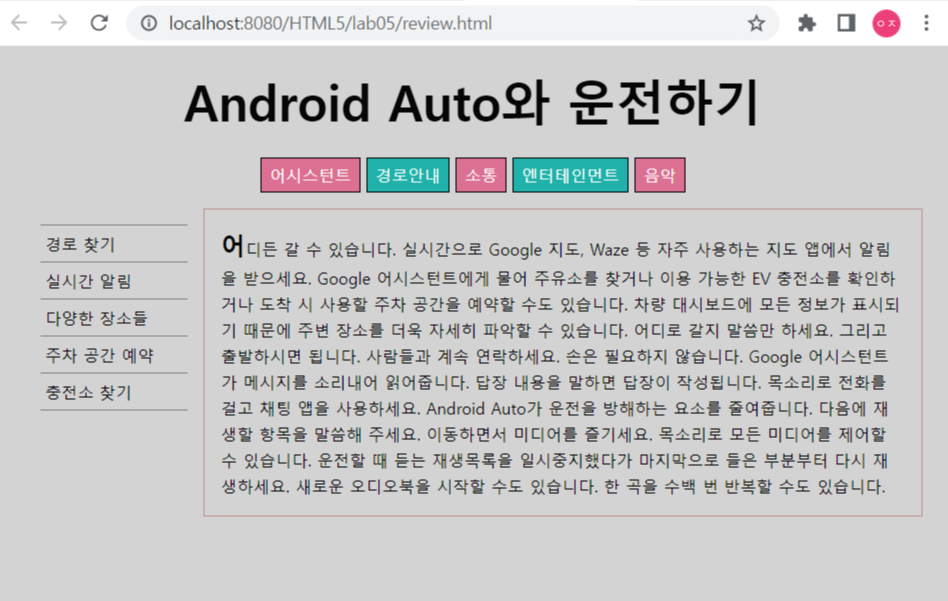
<!DOCTYPE html>
<html>
<head>
	<meta charset="UTF-8">
	<title>Insert title here</title>
	<link rel="stylesheet" href="margin.css">
</head>
<body>
	<!-- 시맨틱 태그 -->
	<header>
		<nav></nav>
	</header>

	<figure></figure>

	<main>
		<section>
			<article>box1</article>
			<article>box2</article>
			<article>box3</article>
			<article>box4</article>
			<article>box5</article>
			<article>box6</article>
			<article>box7</article>
			<article>box8</article>
			<article>box9</article>
		</section>
	</main>

	<footer></footer>
</body>
</html>
@charset "UTF-8"; /* 바깥 여백 설정 */ article { width: 50px; height: 30px; border: 1px solid red; } /* 1번째 article 바깥쪽 여백을 위 우 아래 좌 20px 만큼 설정 */ article:nth-of-type(1) { margin: 20px; } /* 2번재 article 바깥쪽 여백을 상하는 20px 좌우는 50px 만큼 설정 */ article:nth-of-type(2) { margin: 20px 50px; } /* 3번째 article 바깥쪽 여백을 상하는 20px 좌우는 무조건 중앙으로 설정 */ article:nth-of-type(3) { margin: 20px auto; } /* 4번재 article 바깥쪽 여백을 위쪽으로 20px 좌우는 중앙 아래는 40px */ article:nth-of-type(4) { margin: 20px auto 40px; } /* 5번째 article 바깥쪽 여버개을 각각 위쪽, 오른쪽, 아래쪽, 왼쪽으로 각각 설정 */ article:nth-of-type(5) { margin: 0px 10px 20px 30px; } /* 6번째 article 바깥쪽 여백을 왼쪽으로 20px 만큼 설정 */ article:nth-of-type(6) { margin-left: 20px; } /* 7번째 article 바깥쪽 여백을 오른쪽으로 20px 만큼 설정 */ article:nth-of-type(7) { margin-right: 20px; }
'개발자 수업 > HTML5' 카테고리의 다른 글
8. SB (0) 2021.11.05 7. BS (웹스톰) (0) 2021.11.04 HTML5/src/main/webapp/lab03 (0) 2021.11.02 5. CSS 기본 문법 (0) 2021.11.01 4. HTML 문서 구조 (0) 2021.11.01